
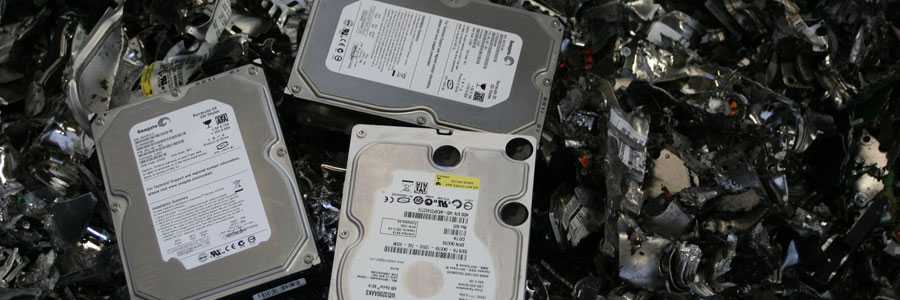
Data Destruction Process
As an e-waste recycling company, when we collect laptops or computer; one common question is asked to us by most of our customers is that – “what will happen to data stored on computers?” Hence, here we would like to share our procedure of Data Destruction:
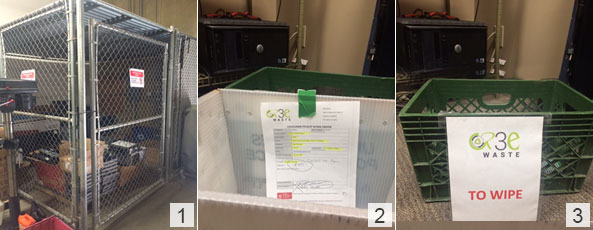
1. All drives are immediately locked in the cage after weigh in. [Ref. Image 1]
2. Drives requiring Certificate of Destruction by the customer are placed in a separate plastic bin with the customer pickup sheet attached and then placed in a cage. Customer information is immediately entered into IMS. [Ref. Image 2]
3. All other drives are placed in a plastic bin labeled “to wipe” and placed in a locked cage. [Ref. Image 3]
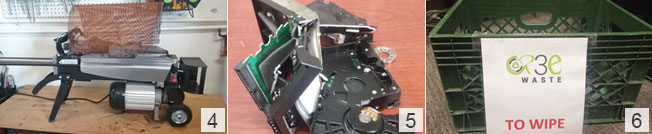
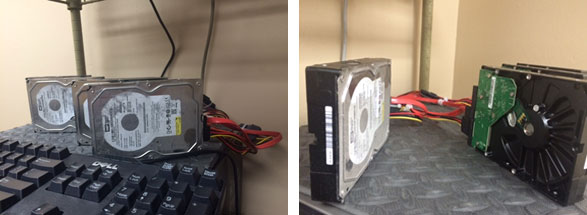
4. Those that are not SATA (PCI, SAS, other) or <80GB are sent to our hard drive destruction device to be destroyed. [Ref. Image 4 & 5]
5. SATA disks greater than or equal to 80GB are added to “To Wipe” bin in a locked cage. [Ref. Image 6]
6. When ready to wipe the customers requesting data wipe/destruction are always done first. Pull the appropriate customer bin(s) and take into DBAN (Darik’s Boot and NUKE) office. Only take one customer at a time so they don’t get mixed together.
7. Boot up one or more computers depending on the quantity of drives to wipe. Each station (4 total) accommodates 4 drives at once.
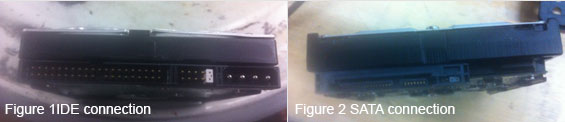
8. Visual inspection: Drive checked for connection type and size.
9. While booting into DBAN software, SATA cables attached to each drive.
10. When software’s ready, operator types in ” autonuke” to start the DBAN wiping process.
11. When the wipe is complete, the software will say green “succeeded” or red “fail”.
12. Failed hard drives go to the hard drive destruction device to be destroyed.
13. Successful wipes go into “Completed Wipes” bin for bar-coding. [Ref. Image 7]
14. If a customer requested Certificate of Destruction a report is generated through the IMS.
15. Login into the IMS – r3ewaste.com/inventory – login with valid credentials – Master – Data Destruction – pull up customer then enter a Serial number, Manufacturer, Size and method of destruction (wiped or drilled) for each drive. When all of been entered hit Submit button to generate a report. [Ref. Image 8]
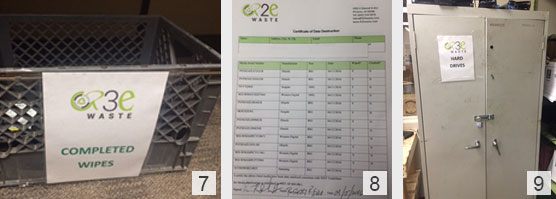
All other wiped drives are input in the IMS, a barcode printed and taken into stock and placed in a locked cabinet in Online Sales Test/Repair office. [Ref. Image 9]
Don’t be a victim of identity theft or fraud, make sure your electronic & computer recycler is destroying your data effectively. If you’re interested in having your E-waste recycled responsibly, please contact us today!